The following instructions are for meaking a large, light-weight stuffsack, suitable for use as a food bag, and strong enough to be hung by the drawstring as a bear-bag. The finished product described here is sized to hold one 12x20 OPSAK, but it can be made in any size to suit your needs. In addition the seams can be sealed with a silicone sealer to make it waterproof.


Materials required:
- 1 yard of 1.1 oz Silnylon (with 1 yard of 60" wide fabric you can make 2 stuffsacks)
- 1.5 inches of 1-inch wide grosgrain tape
- 1 yard of 1/8" draw cord - 1 tiny cord lock, appropriately sized for the draw cord
- High-quality polyester thread (I use a Tex 40 weight)
- 1/4" grommet
Tools required:
- Sewing scissors
- Felt-tipped pen
- Grommet setting tool
- Hammer
- Lighter
Instructions:
Notes: Click on the thumbnails to see a larger version of each photo. Start and end every line of stitching with a backstitch.
- Cut a rectangular piece of the Silnylon fabric 24-1/4" (Side A) x 27-1/4" (Side B).
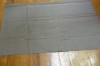
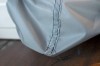
- Fold the fabric in half, wrong sides out, matching-up the two A sides. You should now have a rectangle that is 24-1/4" x 13-3/4". Pin the A sides together (no more than 1/4" from the edge) and stitch, 3/8" from the edge, forming a tube.
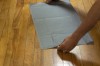
- Rotate the fabric such that the seam is in the middle of the tube pointing up, with the tube laid flat. Lay the seam flat to one side and top stitch it down, 1/4" from the first stitch.


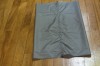
- With the tube still laid flat and seam in the middle, stitch across the bottom of the tube, 3/8" from the edge. This will form the bottom of the stuffsack.


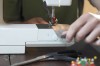
- Fold the bottom of the tube 3/8", then 3/8" again and pin in place. Stitch through all of the folded layers across the bottom of the stuffsack, 1/4" from the outside edge.
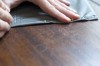
- Singe the edges of the grosgrain tape with the lighter to prevent fraying.
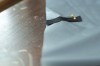
- Flip the stuffsack over such that the side seam is facing down against the table. Match one end of the grosgrain tape to the top edge of the stuffsack, in the center opposite of the side seam and pin down. Stitch the grosgrain tape in place down it's length, 1/8" from each side.
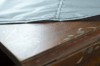
- Fold the edge of the opening over 3/8" of an inch and stitch down 1/4" from the edge to form a hem.

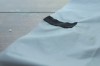
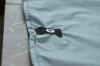
- Using the felt-tipped pen, mark a dot on the silnylon fabric on the opposite side of the grosgrain tape. The dot should be placed 1-1/2" from the top edge of the stuffsack, and centered between the grosgrain tape stitches.
- Using the sewing scissors (or a seam ripper), cut a small X at the place where you marked the dot, going through both the silnylon and grosgrain tape. Push the first half (smaller diameter side) of the grommet through the hole from the silnylon side. Using the lighter, lightly singe the edges of the fabric around the hole where the grommet comes through on the grosgrain tape side. Put the second half (larger diameter side) of the grommet in place on the grosgrain tape side and set in place using the hammer and grommet setting tool.


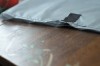
- Fold the edge of the stuffsack opening over 1" and stitch down 1/8" from the inside edge of the fold. Be careful to not hit the grommet with the sewing machine needle. This will form the drawstring tube.
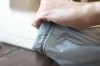
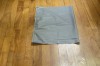
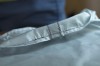
- Turn the stuffsack right-side out. Thread the draw cord through the grommet and drawstring tube. Install the cordlock, trim the draw cord to the desired length, singe the ends with the lighter, and tie the ends together in a knot.
To round-out your bear bag system, be sure to check-out this great article: Assembing an Ultralight Bear Bag System.
Do you have suggestions as to how this stuff sack could be made better? Please let me know in the commments.

Thanks Brienne!
Comments
Pingback
[...] Make Your Own Bear Bag and/or Stuff Sack - A great starter sewing project. [...]